The commander’s guide
Maps and Skirmish AI
Compare every Petalwar map and learn how Skirmish opponents expand, defend, build armies and choose their attacks.
Browse the guide
Skirmish against the AI
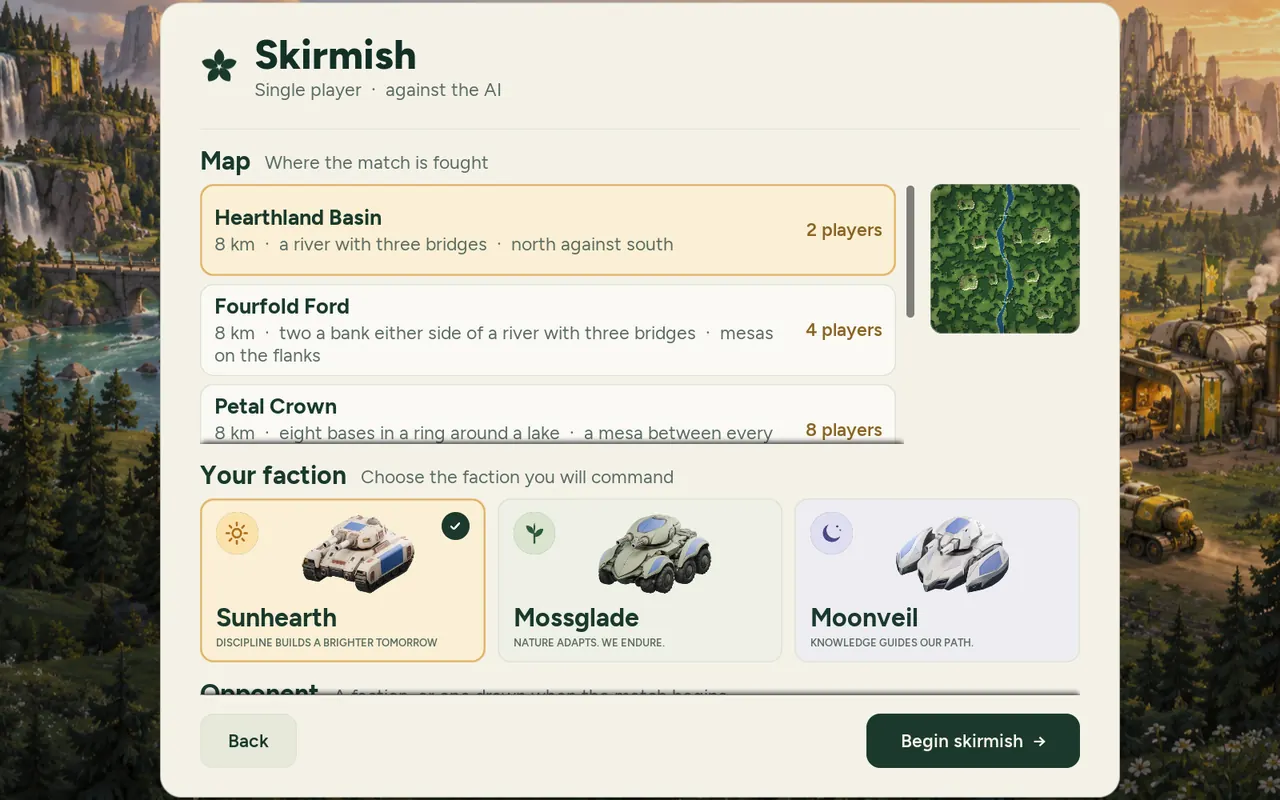
Choose a map, your faction, the opponent’s faction or Random, and up to seven opponents, as many as the map seats. Each AI plays by the same rules you do:
- It is drawn with a personality: a Raider sends small, early waves; a Turtle builds point defence and attacks later with more; a Boomer grows a greedy economy and techs up sooner; a Balanced AI does a little of everything.
- Its form drifts through the match, so a sharp opponent has sloppy spells and a sloppy one sharp spells.
- It spends what it earns. Its army grows with its economy, not the clock: spare matter buys top-tier units, upgrades every factory and founds more, and its engineers help the factories that need them most.
- It marches to win. Its waves gather into one march that crosses by a bridge away from both bases, gathers on your side of the map and assaults when the odds allow. A side that falls far behind pulls back to defend.
- It answers a raid: enemy units within 750 metres of its Heartbloom draw its nearest units, about twice their weight, while the rest of its army keeps attacking. Its interceptors and anti-air tanks guard home and go after enemy aircraft that come within 750 metres.
- It builds everything its factories offer from its top two tiers, missile tanks, mobile shields, mobile radars, anti-air tanks and drones included, but never a design its faction gives up, scouts, tankers or transports. From minute six, once it runs two factories, it adds an air factory (a second from minute fifteen) and sends aircraft with its waves. It builds anti-air only once it has seen your aircraft.
- It plays its faction. A Mossglade AI keeps a Thicket stalker on watch from the second minute and two from the eighth: each takes a post in a wood by the point its waves gather at, by your outlying extractor or halfway along the march, waits there camouflaged and moves on when it is shot at. A Moonveil AI fields a Lantern for every eight armed units, two at least once it builds tier two, a couple with each wave. A Sunhearth AI drills by keeping its lines together.
- With matter to spare at tech two it adds a radar disruptor toward the front, a stealth field at home, a Swarm Bastion at the front and a Reforge Exchange where wrecks lie near the front, and at tech three a Skyharbor. It does not build a navy, refuelling stations, Rootway Gates or Mirage Works, so the water is yours.
- If its Heartbloom falls while its team fights on, its free engineers fetch the shards and regrow it, as you would.
- It waits for your first order before it starts.
The maps
| Map | Seats | Terrain | Water |
|---|---|---|---|
| Hearthland Basin | 2 | 8 km · north against south | a river with three bridges between the two bases |
| Fourfold Ford | 4 | 8 km · two a bank · mesas on the flanks | a river with three bridges between the banks |
| Petal Crown | 8 | 8 km · eight bases in a ring · a mesa between every pair of neighbours | a lake over a kilometre across in the middle |
| Amber Hollow | 2 | 8 km · a valley duel · an open centre and two mesa-lined flanks | none: a dry valley |
| Lilymere | 4 | 8 km · four shores · race around the banks or build a fleet | a broad lake in the middle |
| Willow Divide | 6 | 8 km · three commanders on each bank · shared flank roads | a river with three crossings between the banks |
| Cloverreach | 3 | 8 km · a three-way land battle · an open centre, broad outer flanks and six mesas | none |
| Trillium Mere | 3 | 8 km · three shores · shore roads and outer expansions | a lake 2 km across: fleets |
| Foxglove Fields | 4 | 8 km · four corners for a free-for-all or 2v2 · open cross lanes and paired flanks | none |
| Sunpetal Ridge | 2 | 8 km · a ridge duel · a ridge lookout in the middle with a ramp up from each army’s flank, and two long flank roads that bypass it | none |
| Reedwater Crossing | 4 | 8 km · two a bank for a 2v2 or free-for-all · bank roads join the two crossings, contested expansions in the middle | a river with two bridges and none in the middle |
| Asterfall Lake | 6 | 8 km · six shores · a shore road and an outer road all the way round, a mesa between every pair of neighbours | a lake 2.6 km across: fleets |
| Triarch Heights | 3 | 8 km · three raised strongholds joined by a triangle of high stone viaducts · or down through the contested valley | none |
| Lotus Isles | 3 | 8 km · three island bases, each with one bridge to a hub in the middle · hold the hub to hold the ground route | the sea around the islands: fleets and aircraft go round the hub |
| Bramble Crossroads | 3 | 8 km · three entrances to an arena between three large mesas · a short route through it, a broad outer loop, lookouts to build on | none |
| Cloudpetal Spans | 2 | 8 km · two raised stone islands joined by two high viaducts · split the front | the sea under the viaducts: fleets sail beneath |
| Sedgewater Narrows | 2 | 8 km · two river crossings 3.6 km apart · crossing control or naval control | a broad river with a shipping basin and sheltered inlets for naval yards |
| Havenwood | 6 | 8 km · 3v3 · on each side two forward bases protect a rear teammate · learning players take seats 3 and 6 | none |
| Marigold Canyon | 4 | 8 km · 2v2 · eight wooded mesas, the inner canyon walls rising 92 m · an open middle and long woodland flanks | none |
| Tidelace Atoll | 4 | 8 km · 2v2 · one island with two coastal fronts | the open sea all round the island and a sheltered lagoon 1.75 km across in its middle: fleets |
| Wisteria Confluence | 6 | 8 km · 3v3 · three commanders on each bank · shared bank roads to two crossings 4.2 km apart | a broad winding river with sheltered inlets for naval yards |
| Sunspire Terraces | 6 | 8 km · 3v3 · six raised strongholds, three a side · three high viaducts across the valley, each to the stronghold opposite, and ramps down into it | none |
| Starfall Gardens | 5 | 8 km · a five-player free-for-all · five wooded bastions around an open arena in the middle · an outer road goes round them | none |
| Moonwell Lagoon | 5 | 8 km · a five-player free-for-all · five shores · an inner and an outer ring road, expansions backed by cliffs | a lagoon 2.8 km across: fleets |
| Briarstar Bastion | 5 | 8 km · a five-player free-for-all · five raised strongholds joined by a pentagon of high viaducts · ramps down into the contested valley | none |
| Coral Crown | 6 | 8 km · a six-player free-for-all · six sea forts joined by stone arches | the open sea round the forts: fleets sail under the arches |
On Cloverreach and Trillium Mere every pair of starts is equally far apart, for a three-way free-for-all. For a 2v2 on Foxglove Fields, put seats 1 and 2 on one team and seats 3 and 4 on the other in the lobby: the first pair starts south, the second north. Reedwater Crossing is laid out the same way: seats 1 and 2 share one bank, seats 3 and 4 the other. On Asterfall Lake a fleet can hold the water, but never cuts the outer road.
Neutral camps. In a Skirmish or a match together, every expansion deposit beyond 600 metres from a start begins with a grey extractor and three grey light tanks, hostile to everyone: clear the camp to build there. None stands nearer a start, so no camp can reach a base. On Lotus Isles and Triarch Heights that leaves only the six camps in the middle of the map.
Since Petalwar 0.5.29 you can also play maps you make yourself or get from other players, and change a match’s rules with them: see Custom maps and mods.
All guide topicsBuilding field guideUnit field guide
Supreme Commander and Forged Alliance are trademarks of their respective owners. Petalwar is an independent game and is not affiliated with or endorsed by their makers or the Forged Alliance Forever project.