The commander’s guide
Your army and anti-air defence
Meet the three factions’ armies and what sets each apart, issue combat orders, and protect your forces with mobile shields, anti-air tanks and drone catchers.
Browse the guide
Your army
Each faction has six vehicles of its own, from a light tier-one tank to a tier-three battery:
| Faction | Tier 1 | Tier 2 | Tier 3 |
|---|---|---|---|
| Sunhearth | Dawnling | Emberguard, Kilnbreaker, Hearth Howitzer | Sunlance, Solstice Battery |
| Mossglade | Sprig | Reedrunner, Bramble, Spore Carrier | Thornback, Bloom Battery |
| Moonveil | Glimmer | Veilguard, Comet Carriage | Eclipse, Moonray, Lunarium Battery |
Beside them, a ground factory builds a common line in its faction’s colours, less the designs its faction gives up, and specialists only its own faction fields. A small name under a vehicle says who builds it:
| Vehicle | Tier | Cost | Role |
|---|---|---|---|
| Copperfin Mossglade and Moonveil | 1 | 110 / 210 / 11 s | fast skirmish tank |
| Pebble Sunhearth and Moonveil | 1 | 55 / 90 / 6 s | unarmed scout rover that sees 420 metres |
| Briarback Sunhearth and Mossglade | 2 | 400 / 840 / 30 s | armoured siege tank, 512 metres: 980 hull for Sunhearth, 900 for Mossglade |
| Lumen | 2 | 210 / 430 / 17 s | ion shield breaker |
| Hearth, Acorn or Crescent Mortar | 2 | 280 / 580 / 22 s | mobile siege mortar |
| Hearthkeeper, Grovekeeper or Moonkeeper | 2 | 190 / 400 / 18 s | repairs the vehicles around it |
| Hearthwatch, Grovewatch or Veilwatch | 2 | 210 / 480 / 22 s | unarmed mobile radar: 650 metres of radar and 260 of sight; Moonveil’s hovers |
| Bastion Sunhearth | 3 | 950 / 1,900 / 44 s | twin-cannon heavy tank under its own shield |
| Sunfall, Seedstorm or Starfall Battery | 3 | 780 / 1,700 / 42 s | rocket artillery, 520 metres |
| Daybreak, Heartwood or Apogee Carrier | 3 | 980 / 2,400 / 55 s | one heavy siege missile, 680 metres |
| Cinder Sunhearth | 2 | 250 / 480 / 20 s | armour-piercing tank destroyer |
| Skywarden Sunhearth | 2 | 200 / 420 / 14 s | mobile anti-air, 360 metres |
| Sunquill Sunhearth | 2 | 320 / 640 / 24 s | guided missile tank: two missiles a salvo at 336 metres, stopping to fire; 1,050 hull and heavy armour |
| Burr Mossglade | 2 | 240 / 520 / 22 s | rocket salvo tank |
| Briarburst Mossglade | 2 | 280 / 620 / 23 s | fast guided missile tank: a four-missile salvo with a wide splash at 320 metres, fired on the move; 650 hull |
| Thicket stalker Mossglade | 1 | 120 / 220 / 12 s | camouflaged scout walker with a light gun at 176 metres; sees 380 |
| Wisp Moonveil | 3 | 750 / 1,700 / 36 s | disruptor hover tank |
| Moonspike Moonveil | 2 | 340 / 780 / 26 s | precision missile hover tank: one armour-piercing missile at 360 metres; 650 hull under a 450 shield |
| Lantern Moonveil | 2 | 180 / 400 / 16 s | unarmed walker whose beam marks a target for Moonveil’s weapons; sees 360 |
| Dawnwatch, Canopywatch or Starwatch T1 | 1 | 90 / 180 / 10 s | mobile anti-air: aircraft and drones only, 260 metres |
| Anti-air tank T2 | 2 | 240 / 480 / 20 s | mobile anti-air, 340 metres |
| Anti-air tank T3 | 3 | 640 / 1,280 / 36 s | mobile anti-air, 440 metres |
| Hearth, Grove or Veil Aegis T1 | 1 | 190 / 420 / 20 s | mobile shield: an unarmed hull with a 700-point dome over the units within 30 metres |
| Aegis T2 | 2 | 450 / 1,000 / 30 s | a 1,500-point dome over 50 metres |
| Aegis T3 | 3 | 1,400 / 3,200 / 60 s | a 1,600-point dome over 60 metres |
- Sunhearth holds the line with the heaviest armour. Its Sunlance rail lance ignores armour. Only Sunhearth fields the Bastion heavy tank, and only Sunhearth has the Hearth drill: a Dawnling, Emberguard or Kilnbreaker with six or more of them within 36 metres, itself counted, fires 25% faster, on top of a command relay’s bonus. A small sun sigil under the tank shows it, and its card says “Hearth drill · +25% fire rate”, or “Hearth drill · out of formation”. A formation of six or more drills; tanks strung out 40 metres apart do not. Sunhearth builds no Copperfin: its fast raiders are its aircraft.
- Mossglade fields the Thicket stalker instead of the Pebble: a tier-one scout walker with a light gun, camouflaged once it has stood still for half a second, and anywhere in a wood, even on the move. The enemy cannot see it (in the fog, on radar or on the minimap) or target it unless one of their units or finished buildings, or an ally’s, is within 60 metres, a Lantern of theirs marks it, or it fired in the last four seconds. You see your own stalkers see-through while they are hidden, with “Camouflaged” in the card, or “Seen · stand still or enter a wood to hide” when they are not. Mossglade builds no Bastion. It is fast: Reedrunners circle their target, and Bramble seed blasts slow everything nearby.
- Moonveil fields the Lantern, an unarmed tier-two walker whose beam holds one enemy within 300 metres, the one you order it to attack or the nearest it finds. While the beam is on it, your Moonveil weapons do 25% more damage to it (an ally’s do not), and you keep it in sight through fog, camouflage and stealth fields until 15 seconds after the beam leaves. A ring turns under the marked target, and its card says “Marked by a Lantern · +25% from Moonveil”. Moonveil builds no Bastion and no Briarback. It hovers on lighter armour with a regenerating shield. Veilguards escort under shields that recover after combat, Moonrays burn through with rapid beams when they can see their target, and the Eclipse does fivefold damage to shields.
- Missile tanks. Each faction’s tier-two missile tank fires guided missiles at ground targets and ships, never at aircraft, and keeps its distance at the edge of its reach; it cannot fire at anything closer than 32 metres. The Sunquill is the most heavily armoured and stops to fire, the Briarburst is the fastest, and the Moonspike reaches furthest and carries a shield. Like the mobile radars, they are sized to roll out of any tier-two ground factory.
- The tier-three siege batteries (Solstice, Bloom and Lunarium) outrange every rocket truck, 760 to 900 metres, with heavy shells on a slow reload; they cost 700 / 1,400 / 45 s and drive slowly.
- Artillery vehicles drive into position and deploy before they fire: about a second for the tier-two guns, 1.8 seconds for a rocket battery, three for a missile carrier and five for a siege battery.
- Turning. A ground vehicle well off its heading stops, turns on the spot and then drives along its hull, so nothing slides sideways or backwards. Aircraft and ships steer as they go.
- Leaning. A ground vehicle leans with the ground under it: it pitches up a bridge ramp (33 degrees at its steepest) or a mesa ramp (22), rolls across a slope and eases over the foot and the crest, its turret riding the hull. Moonveil’s hover tanks lean half as far and float level over water; walkers stay upright. The lean is only how it looks: aim, reach and line of sight are as on level ground.
- Mobile shields need no power. One covers your units of its own tier and below, but not other shield vehicles and not its own hull. A hit is taken by the nearest dome that is up, mobile or built (a shield emplacement’s own dome first when the emplacement is hit), so overlapping domes are drained one after another, none of them recharging while what they cover is under fire, and a dome drained to nothing is down until it has recharged in full: for a mobile shield, eight seconds after the last hit and then 25 to 30 seconds. Each mobile shield keeps with the nearest armed unit that no other carrier covers, so several of them spread over an army instead of stacking over the same few tanks.
- Unarmed units on an attack-move (shields, repair vehicles and scouts) stop short of armed enemies and close up behind your nearest guns, then carry on once the way is clear.
- Veterancy. A vehicle, aircraft or ship earns a star at 3, 6, 10, 15 and 21 kills, and each star adds 10% to its health.
- Guarding. A unit you send somewhere guards that spot. It engages what comes within its range, fires back at whatever hits it, and leaves the spot by up to a fifth of its range (15 to 60 metres, 38 for a light tank) to get a shot before it goes back. H stops a unit and holds it strictly where it stands.
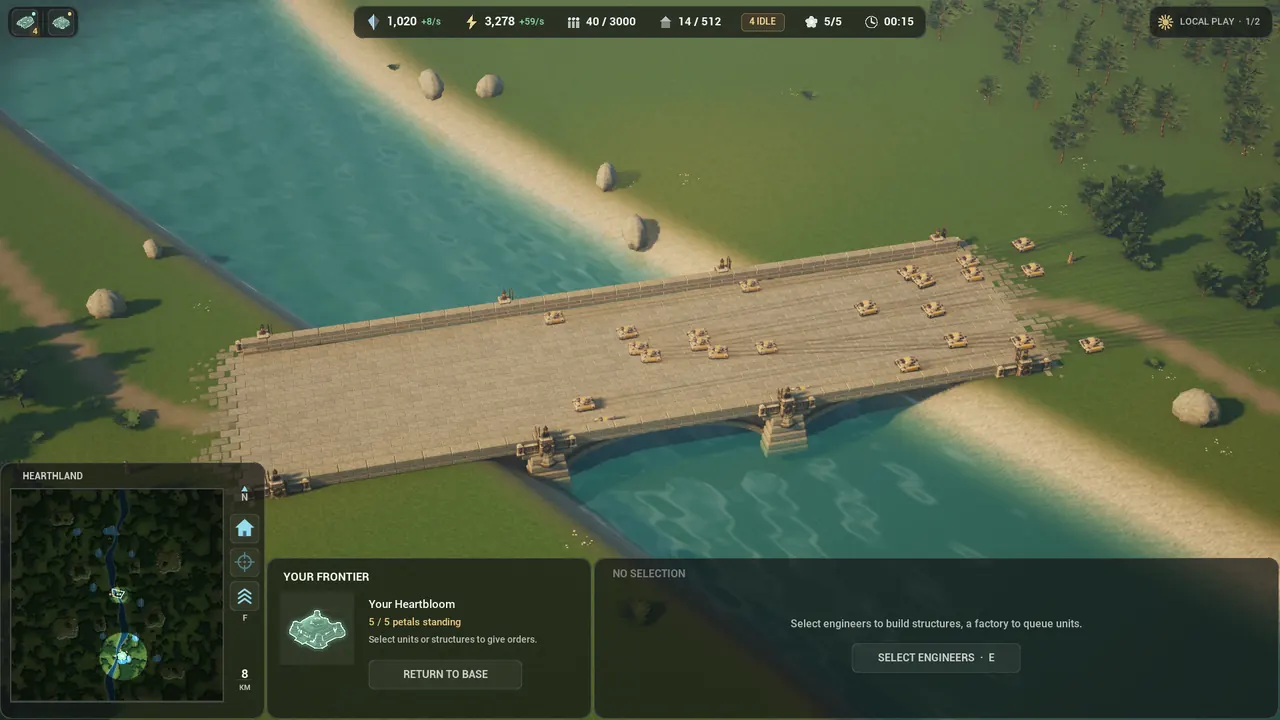
- Formations. A group you order moves as one, as in Supreme Commander: a front about two and a half times wider than it is deep, facing the way it goes, direct-fire tanks in front, mobile shields and support behind them and artillery at the back, spaced by their size. It moves at the pace of its slowest unit, narrows into files over a bridge or through a gap and widens again after, and turns to face its way when it stands. Artillery and missile tanks in a group with direct-fire guns, and anything slower than 60% of the group’s median speed, follow at their own pace instead, so the tanks arrive together and the artillery sets up behind them as it comes.
- Attacks gather first. Sent at a target, a group forms up just outside its reach, waits for most of the group (or 20 seconds) and then goes in together, instead of arriving one tank at a time. Once in reach, units stand and fire instead of driving round to close in.
- Join a group. Right-click one of your own units with others selected: they march at the rear of its formation, or follow it in rings if it stands still.
- Splitting fire. Left to pick their own targets, half of a group keeps the shields under fire while the other half takes the nearest target no shield covers. An attack order is obeyed by all.
- Attack-move presses on. On an attack-move (Q), units do not stop on a bridge or at the river for a target across the water: they fire on the move and take up the fight on the far bank.

All guide topicsBuilding field guideUnit field guide
Supreme Commander and Forged Alliance are trademarks of their respective owners. Petalwar is an independent game and is not affiliated with or endorsed by their makers or the Forged Alliance Forever project.